Off-Grid Culinary Adventures: The Ultimate Homemade Artisan Pretzel Bread Recipe
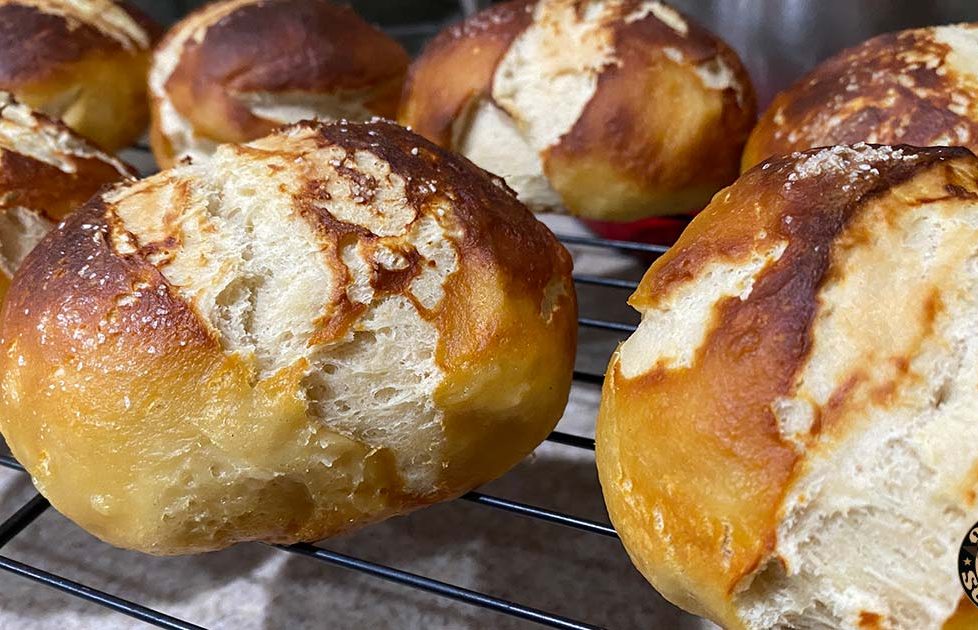

In a world where convenience often trumps self-reliance, there’s something deeply satisfying about creating your own food from scratch. One culinary endeavor that embodies self-sufficiency and off-grid living is baking homemade artisan bread. With just a few simple ingredients and a little patience, you can craft loaves that rival those found in the finest bakeries.
In this article, I am going to walk you through the process of making your own homemade artisan bread, complete with an enriching twist: the use of milk instead of water.
Dough Ingredients:
Boiling Solution:
1. Begin by heating the milk and butter until warm, ideally between 100 to 110 degrees Fahrenheit. The butter will not completely melt, and this is perfectly fine. Combine this mixture with the undissolved Yeast and brown sugar in a large mixer bowl. Make sure the liquid is not too hot, or you will kill the Yeast – more on this below in Proofing Yeast Instructions
2. Stir in the salt and 2 cups of flour, then beat the mixture for 3 minutes. Gradually add enough remaining flour to make a soft dough.
3. Transfer the dough to a floured surface and knead it until it becomes smooth and elastic. This usually takes about 8 to 10 minutes. An alternative and easier option to this would be using a dough hook in your mixer, which saves you from sore hands and cuts down your kneading time in half.
4. Place the dough in a greased bowl, cover it, and let it rise for about 1 ½ hour or until it has doubled in size.
5. Preheat your oven to 350 degrees Fahrenheit.
6. While the dough is rising, prepare the boiling solution by combining 3 quarts of water with ¾ cup of baking soda and bringing it to a boil.
7. Once the dough has doubled in size, punch it down and divide it into eight equal pieces. Form each piece into a tight, smooth ball.
8. Boil each loaf in the boiling solution for 2 minutes, turning them after 1 minute.
9. After boiling, remove the loaves from the pot using a slotted spoon and place them on a greased baking sheet.
10. Bake for 20 minutes, then reduce the oven temperature to 350 degrees Fahrenheit, or continue baking until the loaves are evenly browned.
11. Finally, remove the loaves from the pan and allow them to cool on a wire rack.
Why Use Milk Instead of Water:
One key element that sets this homemade artisan bread recipe apart is using milk instead of water. Milk serves as an enriching agent in bread dough. Enriching agents, such as eggs, fats (like butter or oil), and various sugars or sweeteners, are used to enhance the flavor and texture of bread.
Bread made without enriching agents is referred to as “lean dough” and typically contains only flour, water, salt, and Yeast. It results in traditional crusty European and American bread, characterized by a firm crust and an elastic, springy interior with large irregular holes.
Substituting milk for water in bread dough introduces fat (from milkfat) and sugar (from lactose). This brings about several changes:
Incorporating milk into your homemade artisan bread not only enriches the taste and texture but also elevates your bread-baking skills to a new level of culinary mastery.
How to Proof Yeast for Perfect Homemade Artisan Bread
Before you start making your delicious homemade artisan pretzel bread, one crucial step in the process is proofing the Yeast. Proofing Yeast is the process of activating the dormant yeast cells, ensuring they are alive and ready to work their magic in your dough. This step is essential for achieving your bread’s perfect rise and texture. Here’s how to do it:
Ingredients for Proofing Yeast:
The water should be between 100 and 110 degrees Fahrenheit. Using water that’s too hot can kill the Yeast, while water that’s too cold won’t activate it properly. A kitchen thermometer can be handy for this, but you can also gauge the temperature by touch.
Once your Yeast is successfully proofed, you can now get on with the rest of your homemade artisan bread recipe. The active Yeast will work its magic, helping your dough rise beautifully and creating the perfect texture and flavor in your bread.
Proofing Yeast is a small yet crucial step in the bread-baking process. It ensures that your Yeast is active and ready to do its job, setting the stage for a successful baking experience. So, don’t skip this important step, and enjoy the satisfaction of crafting your own homemade artisan bread, complete with perfectly proofed Yeast.
In a world where fast food, takeout, and pre-packaged meals have become the norm, the art of cooking at home for your family is a skill that is often overlooked. Learning to cook for yourself is not merely about preparing food; it is about gaining control over what you eat, adopting self-reliance, and nurturing a deeper connection to your food and well-being.
If you’re serious about preparedness and the off-grid self-reliant lifestyle, learning how to cook from scratch is something you cannot afford to ignore. Here our some of our past favorite articles on how to learn how to cook from scratch.
For more information on cooking from scratch, check out our favorite cooking books: