Some of the links in this post may contain affiliate links for your convenience. As an Amazon Associate, I may earn a small commission from qualifying purchases without any increase in price to you.


Tired of replacing ripped clothes when a quick fix could save the day (and your wallet)? This guide empowers families to save money and build resilience with a DIY sewing repair kit. We’ll tell you exactly what you need to gather, from needles and thread to crafty extras, so you can tackle rips, replace buttons, and extend the life of your loved ones’ clothes.

Remember the resourcefulness of the Depression era, where “Use It Up, Wear It Out, Make it Do, or Do Without” wasn’t just a saying, it was a way of life? Instead of tossing a shirt with a popped button or letting a favorite pair of jeans languish with a small tear, you’ll learn how to create a personalized mending kit equipped to breathe new life into them. Think of it like transforming scraps into delicious meals during hard times – it’s about utilizing what you have, mastering basic skills, and fostering a family culture of self-reliance that transcends trends and saves you precious dollars. So, channel your inner Depression-era innovator and get ready to mend your way to a more sustainable, budget-friendly wardrobe – one stitch at a time!

In this post

Is it worth repairing clothes?

A friend of mine tells me her motto in life is “I’d rather throw it than sew it” and she’s not alone in that. With thrift stores, clearance racks, and friends and family sharing old items, repairing damaged clothing can seem pointless even to someone trying to squeeze every penny for all it’s worth. So why do you need a survival sewing/mending kit? 

  1. Sometimes we just love a piece of clothing but it needs to be repaired. 
  2. There are practical pieces that may be hard to replace
  3. If you are away from home, it may save your bacon. Soldiers and sailors traditionally carried small first aid kits to do basic repairs on their clothing and gear. One common name for these military sewing kits was a “housewife.”

Traditionally, soldiers and sailors have always had their own sewing kits. Frostbite from a jacket or sleeping bag that doesn’t close properly, camouflage ruined by a ripped shirt (showing solid colors or skin underneath), tripping on something badly ripped, or catching your gear on rips or extra length (sleeves or pants, especially) are all possible dangers that come to mind. Dying because your uniform was damaged is a stupid way to go. And those are still potential dangers if you are doing any kind of outdoor physical activity. 

Of course, most of us spend most of our time in cars and buildings, not the wilderness, but the ability to do a quick repair can still make our lives a lot easier. If you’re walking out the door to go see a show or enjoy a nice dinner and rip your outfit, you may not have a back-up. Patching a garment is fast and easy. 

Basic Traveling Sewing Repair Kits

The simplest one can still be found free at the front desk of some hotels, or even in your hotel room. It is little more than several colors of thread, a needle, a pin or two, and a needle threader. It is just enough to repair a smaller tear or button. 

You can easily put this in our old friend the Altoid tin to make a slightly more comprehensive sewing kit. Add small embroidery scissors or snips, an iron on patch, some quilting pins, and a measuring tape. You might even squeeze in a small pen or some chalk for marking repairs.

I am a big fan of quilting pins because they are a lot bigger and have brightly colored balls on the end, making them easy to find. My eyesight is no longer 20/20! If you have space, add a bodkin, or at least a large safety pin, to help fix drawstrings that get pulled back into your garment.  

At Home Sewing Kits

An at-home kit includes both more items and full-size items. For example, a pair of scissors instead of embroidery snips. 

  1. A full-size pair of sewing scissors is the most basic item. “Sewing scissors” are a distinct classification of scissors. Most people who sew, or know those who sew, classify using sewing scissors to cut paper (or anything except fabric) as a high crime and misdemeanor. Don’t do it, and don’t let your family do it. It dulls the blades and regular paper scissors are cheap. You don’t need “pinking shears” for a simple sewing kit. They are designed to reduce fraying problems when cutting out patterns. 
  2. Embroidery scissors or snips are useful for snipping thread, even when you have full size scissors. 
  3. A seam ripper. These are used to cut thread that has already been sewn, and so is too close to the fabric to use scissors. The basic $2 models are still great, but you can also find slightly fancier or sturdier ones, like this model with a built-in magnifying glass.
  4. A button box. You know when you get a new shirt and it has an extra button in a little bag, which you promptly put to the side and lose? Those go in the button box, as do any other random buttons you find. It’s a good idea to pick up some simple buttons at a hobby store and add them, but the goal is to have some buttons available if you lose or break one and need a replacement. 
  5. Needles and thread. Needles break. You can generally buy a pack of a dozen plus needles for hand sewing in several sizes for only a few dollars in any craft store. It’s worth having a couple of these around. If you are using a sewing machine, you should also have a spare package or two of general purpose (not embroidery, leather, upholstery, etc.) needles for your machine.
  6. A needle threader or twelve. This one looks fairly sturdy, but the most commonly available one is a tad more easily broken. (There’s a reason you get 50 for $4.) They do just what the name says and make repairs faster and easier, with significantly less cussing. 
  7. Thread in lots of colors. Packages with small spools of thread in several colors are widely available, even in dollar stores. While this is admittedly low-quality thread and there is little chance of it exactly matching your garment, it’s good enough for a quick repair. If you need more colors, fabric and hobby stores have several rainbows to choose from – one from each major thread manufacturer – so you can certainly find what you need. If you usually wear jeans almost every day, add a heavy-duty polyester or cotton-wrapped polyester in a grayish-blue to your sewing kit. This dual duty denim thread is a good option to mend jeans.
  8. A pin cushion, safety pins, and quilting pins and/or clips. The clips are really easy to use and to find if you drop them, but they don’t work everywhere. Regular pins work just fine but may work their way out of place. Safety pins stay in place but fabric can get stuck in them. Quilting pins can work their way out too, but they remain my favorite.
  9. Iron-on repair patches and an iron. These are last on this list, but may be first in usefulness. They come in a variety of colors, including denim and khaki. They are about 1.5×3 inches and you simply iron them on where you have a hole or rip. Iron-on patches make a quick hem repair as long as you have an iron handy.  It doesn’t get faster or easier than that! If you have kids who are tough on their clothing, this could be your new best friend.

Pro Tips

Before tackling your favorite shirt, practice basic stitches like the running stitch (strong and straight), backstitch (secure and reversible), and whip stitch (fast and neat for finishing edges). Experiment on fabric scraps to build confidence.

Remember, your kit can handle minor repairs on household items like curtains, towels, or even stuffed animals.

Nice to Have Items

  1. Bodkins. I love bodkins, and most people have either never heard of them or don’t realize they exist. When your drawstring gets pulled back into your sweats, a bodkin makes it easy to fix. It’s got a big loop you put the string through, then you thread the bodkin (which looks like a huge blunt needle) through the channel for the drawstring. That’s it.
  2. Thimble. When you need on, you need on, or you will end up in pain. My personal preference is for leather over metal because it’s more comfortable. 
  3. Fabric glue/adhesive. Tacky Glue is the classic most of us probably saw our moms use, but Gorilla Glue has a waterproof version that would be great for a lot of other uses.
  4. Hem tape. For a quick repair to hems or sleeves, or even to hold ripped fabric together in a pinch, hem tape is your pal. It’s not a permanent solution, but it sure is speedy. 
  5. Related to iron-on patches but slightly different, you can sew decorative patches over a hole or rip. (Some may say they are “iron-on” but I wouldn’t believe them.) When I hand sew patches, I always use a thimble because it’s tough to push the needle through the patch and my fingers are sore before I’m done. If you use a sewing machine, you should use a different needle, one designed for thicker fabrics, and possibly a foot designed for sewing on patches. (I have a gadget problem, so I bought a cheap pack of 30+ speciality sewing machine feet to play with.) 
  6. Horse blanket / kilt pins. These are enormous compared to normal safety pins, but the use for emergency repairs is pretty much the same, just for thicker items. You can’t use a normal safety pin to fix a sleeping bag or down-filled coat. You can use one of these to hold them together until you can fix them more properly.
  7. Finally, I love my magnetic wand. It’s not technically used for sewing, but you wave it across the floor and all the hidden pins latch onto it. Much simpler than looking for them. If they are latched onto something, like carpet, this won’t pick them up, but it does speed up the process immensely. If you have someone potentially doing metal work in your home, it will also work to pick up metal shavings.

Containers to Store Your Kit

Most people use tins for their sewing kit because (1) we all end up with extra ones after the holidays and (2) there are lots of pointy things designed to cut and poke in sewing kits, so they really need to be in something sturdy. 

If you gather all the items listed in this article, they will easily fit in the traditional container for a home sewing kit: the “Royal Dansk Danish Butter Cookies tin in blue. This is universally acknowledged as THE storage container for sewing kits. To be honest, no one knows why, but it is a fact. 

Next Steps in Sewing

If you really want to sew or do anything beyond minor repairs, you will need more tools such as a sewing machine, cutting board, rotary scissors, a fabric measuring tape, and more. 

FAQ

What are the most common clothing repairs?

Common hand sewing repairs for clothing include securing ripped seams, replacing missing buttons, fixing loose hems, mending small tears, and addressing minor snags or pulls. These repairs can significantly extend the life of garments and are achievable with basic sewing skills and a well-equipped sewing kit.

Are there any online resources for learning basic sewing skills?

Free sewing tutorials and repair guides abound! Utilize websites, YouTube channels, and online communities for expert tips and inspiration.

What additional tools would I need to expand my kit for more complex repairs?

For complex tasks like heavy fabrics, intricate seams, or zipper replacements, consider graduating to a sewing machine. Not only will it tackle thicker materials with ease, but its speed and precision will elevate your repairs and unlock a world of creative sewing possibilities!

Final Thoughts

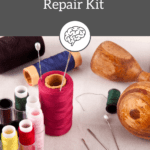
For the most basic survival sewing repair kit, the key items are a needle, thread, some kind of scissors, and (for most of us) a needle threader. However, the more you add to it, the more items you can repair and the longer-lasting your repair will be.

When you get your survival mending kit together, share a list of what you’ve included!