Log Home Repair. I have worked hard to maintain the home.


One of the major drawbacks of owning a log home is the amount of maintenance that such homes require. Logs decay if they are not properly maintained. To keep a log home from decaying, a log home owner must constantly inspect, stain, and repair the logs.
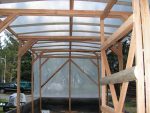
My wife, “Kari”, and I have lived in a log home for the past 11 years. The home was built about 36 years ago. Kari and I have worked hard to maintain the home, but not all of the previous owners were as diligent as we are. At least one previous owner neglected to stain the logs for much too long. That owner also evidently stacked firewood against the wall of the home near one of the sliding doors. That stacked firewood trapped moisture against the logs at that point, allowing decay to begin in one of the logs. Eventually, the decay progressed to the point that action needed to be taken to prevent further damage.
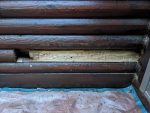
Using a knife, chisels, and other hand tools, I cut away all of the decaying wood from the impacted log until I got down to the sound wood underneath. I felt like a dentist drilling out the decay from a cavity in a giant tooth prior to filling the cavity. I have seen videos of log home repair professionals using chainsaws to remove decayed wood at this step in the process. Even though it took longer, I preferred to use hand tools. The use of hand tools was safer, especially when large steel spikes were encountered in the log. The hand tools were also able to remove wood much more precisely than power tools.
I initially tried to shape just one custom-fitted piece of wood to fill all of the irregularly-shaped voids from which I had removed decayed wood. I quickly found that I was not skilled enough as a sculptor to exactly shape a plug with so many different curves, planes, and other shapes in 3 dimensions.
So I switched to Plan B. That plan was to create a flat surface on the front of the log which I could cover with a piece of log siding. I could then fill in the various sections of the void beneath the surface with a series of custom-cut wooden plugs. The seams between the plugs would not detract from the appearance of the repair, since they would be hidden beneath the piece of log siding. The log siding would also help to protect the seams between the plugs from the elements.
With that in mind, I used a 4.5″ compact circular saw to cut a series of parallel cuts each about 2 inches apart over the surface of the log to a depth of 1.5 inches. I then used a hammer, chisel, and knife to cut away the wood between the parallel cuts. This resulted in the flat surface that I desired.
Next, I sprayed Tim-Bor Professional Insecticide and Fungicide over all of the surfaces exposed by the removal of decay, and by flattening the surface. This application was intended to help prevent future decay. I then allowed the treated surfaces to dry for several days.
I then used caulk to seal the deepest crevasses behind the voids that I would be patching with wooden plugs. This would prevent any moisture that might find its way through the seams between the plugs from penetrating even deeper into the wood.
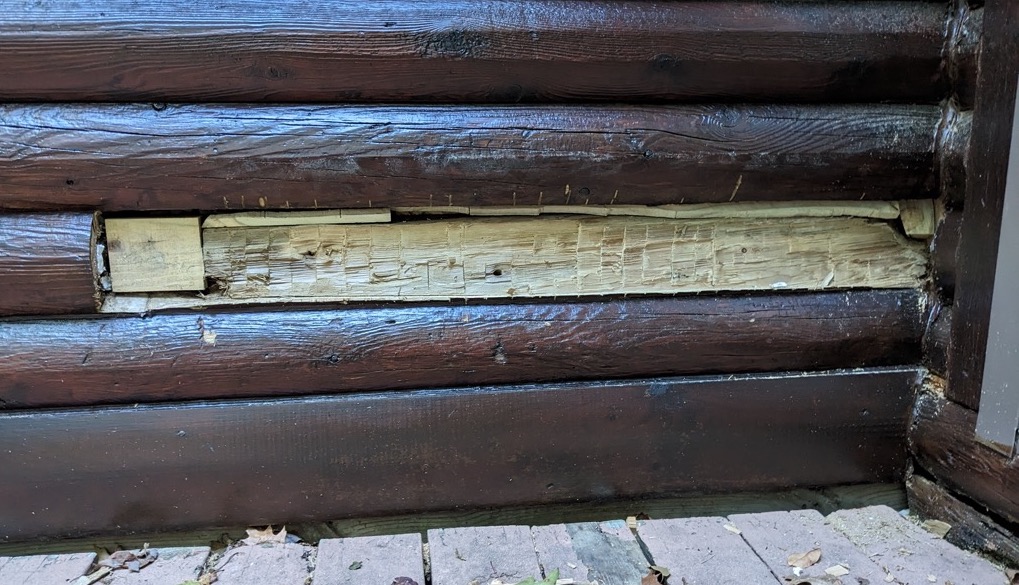 Next, I custom-cut a series of wooden plugs to fit the various sections of the void where decay had been removed. I then used Liquid Nails Extreme Heavy Duty Interior/Exterior Construction Adhesive to glue the plugs in place. I then allowed the adhesive to dry for 24 hours.
I then used caulk to seal the seams around the various plugs. This was to prevent any moisture that might find its way around the siding from penetrating any more deeply into the wood.
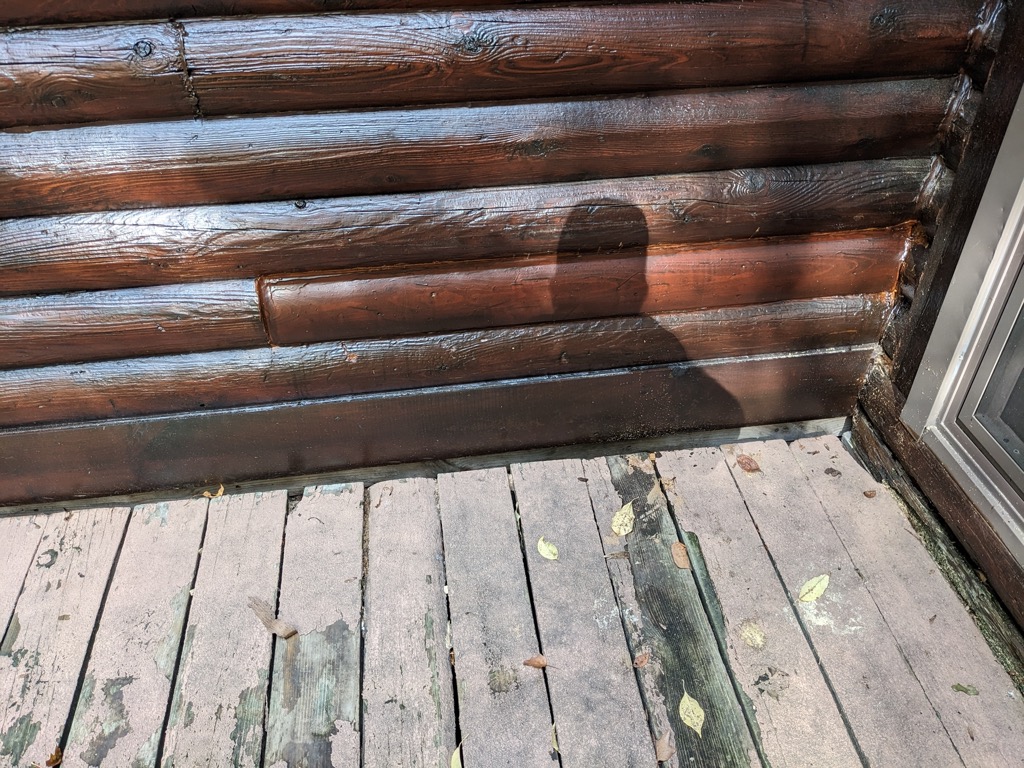
 I had already cut a piece of log siding to fit the flat surface over the area being repaired. I glued and nailed that piece of siding into place. The nails were primarily intended to hold the siding in place while the glue was drying. The piece of siding gave the repair a finished appearance, and helped the protect the repaired area behind the siding from the elements.
I then caulked around the seams of the piece of log siding. This was to prevent any moisture from penetrating around the edges of the siding.
Next, I stained the piece of log siding to match the color of the existing logs. I would apply a coat of stain, wait at least 24 hours for the coat to dry, and then apply the next coat of stain. It took 7 coats of stain in all for the log siding to match the color of the existing logs.
 There were only a cumulative total of 5 coats of stain on the existing logs surrounding the area that was repaired. I attribute the need to use 7 coats of stain to match the already existing 5 coats of stain to two factors. The first factor is that the wood of the new siding was lighter than the 36-year-old original logs, which had been darkened over time. The second factor was that the coats of stain on the original logs had also darkened over time. As a result, it took more coats of new stain on new siding to look as dark as fewer coats of old stain on old siding.
The stain that I use on our home is Sikkens ProLuxe Cetol Log & Siding. We use the butternut color. The stain provides excellent protection to the underlying wood as long as it is consistently maintained. We stain one of our walls each year, so that cumulatively each wall of the house is stained once every four years.
There is some archeological evidence of pre-bronze-age construction using horizontal, notched, inter-locking logs. I cannot imagine the difficulty of felling significant amounts of timber using stone tools. I wonder if these structures utilized wind-felled timber, and the builders merely notched those timbers using stone tools.
I also cannot imagine the difficulty of felling significant amounts of timber using bronze tools. Some historians report that log cabin construction techniques were used in certain bronze age societies. I am not personally acquainted with any archeological evidence to support this assertion.
Log cabin construction really became practical beginning in the Iron Age. The iron axe head was the first truly effective tool for felling significant amounts of timber. There is a well-preserved log structure from the Scythian civilization about 300 BC or so. It was preserved in permafrost in a burial chamber in Pazyryk, Kazakhstan.
The earliest written reference to log cabin construction dates from the first century BC. Roman military engineer and architect Vitruvius referred to the method as being used in Pontus, an area along the southern coast of the Black Sea in what is now Turkey. Log cabin construction is still the form used for traditional buildings in that area today. It is interesting to note that residents of Pontus were present in Jerusalem on the day of Pentecost (Acts 2:9), that the Apostle Paul’s co-workers Aquila and Priscilla were from Pontus (Acts 18:2) and that the recipients of the Apostle Peter’s first epistle were from Pontus as well as its neighboring regions (1 Peter 1:1). Some of these biblical personages may well have been born and raised in log cabins.
Contrary to popular belief, the earliest British settlers of Jamestown and Plymouth did not build log cabins. The construction method seems to have been first used in North America by the Finnish and Swedish settlers along the Delaware River beginning in the 1600s. The advantages of log structures in the North American context were quickly noted by immigrants from Germany, Ireland, Scotland and a host of other nations. Log cabin type construction quickly became widespread across the American frontier.
The chief advantages of log cabin construction were that the only tool that was required was an axe, nails were not required, log cabin style construction required less skill than many other construction methods, the resulting structures provided better insulation than homes built using most alternate construction methods at the time, and log cabins made effective use of the timber that was being cleared away to allow for farming.
The log home repair process that I outlined above successfully removed decayed wood from the impacted log, filled the resulting voids with sound wood, and provided effective protection from the elements for the wood beneath the new log siding surface. I plan to use the process again if any other areas of significant decay develop in our log home.
In general, the earlier that developing decay is addressed the easier it is to address it. If it is addressed early, decay can be removed from the surface of the logs, rather than waiting until it penetrates the interior of the log and threatens the structural integrity of the home.
If I was building a new home and desired the log-home-look, then I would use cement faux log siding rather than real logs in my construction. The cement faux log siding is much more fire resistant than natural logs, and requires significantly less maintenance. Then I could dedicate more time to productive pursuits, and less time to maintaining the structure of the home.
I did not receive any other financial or other inducement to mention any vendor, product, or service in this article.