Winter Sowing – Starting Seeds Outdoors • Homestead Lady


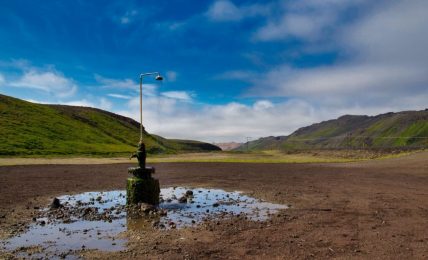
Starting seeds outdoors instead of indoors produces strong, healthy plants that are already acclimated to their environment. Also known as “winter sowing”, starting seeds outdoors in containers is simple and doable in temperate climates. You can plant your seeds in containers right after Christmas and wait for them to sprout in the spring. Stop creating a huge mess indoors with your seed starting – move it outdoors!
I’ve been gardening for over twenty years and in all that time I’ve always started my seeds indoors. Starting seeds indoors kept the seedlings close to me as they developed so I could keep an eye on them. It also provided a controlled environment to protect the baby plants from too much wind, water, drought, sun, and shade.
In short, it seemed like the best way to keep my seedlings safe and healthy.
However, after trying several methods of starting seeds outdoors, I’ve finally determined that outdoor seed starting produces healthier seedlings that are precisely acclimated to their outdoor lives. The benefits of starting seeds outdoors are discussed again further on in the article.
The first thing to do is clear up a little confusion that sometimes occurs because of the contemporary name of this outdoor seed starting process: Winter Sowing.
Starting seeds outdoors in containers can be done anytime of year, regardless of temperature. The novelty of this fact and the joy that a gardener can find sowing seeds IN WINTER has meant that the title of “Winter Sowing” has stuck. Which is great!
However, you can follow the process of “winter sowing”, or starting seeds outdoors in containers, during the growing season and into the fall garden, as well.
In temperate climates, this means that you can typically start sowing seeds in containers and placing them outdoors in December (or whenever your first truly cold month is) and then continuously sow more seeds until the late summer when you can start planting for the fall garden.
There are some exceptions to this that we talk about later on but this is generally a good rule of thumb. Green thumb, we hope, because this method produces fantastically strong, healthy seedlings!
The first thing to know is that you can start any non-tropical seed from December up through the end of your growing season in the late summer in most areas. I live in growing zone 6 and plant my seeds in containers outdoors right after I put away my Christmas decorations the first week in January.
I usually have a goal to plant the first week of December but I’m always too preoccupied with holiday fun. Which is perfectly fine – tis the season, after all!
I plant my seeds in their containers, place them outside, weigh them down against winter winds, and don’t think about them again until spring knowing that the seeds inside will germinate when they’re ready. It’s that easy!
To make it even easier, I have some winter sowing worksheets I made for my newsletter family and I’d love for you to have them! These sheets are specifically for winter sowing herbs, but you can use them to get started growing pretty much any seeds outdoors. Once you sign up, they sheets should show up in your inbox (plus you’ll get access to our extensive Member Library).
Starting seeds outdoors in containers is a super simple process, so don’t overthink this or stress out. Here are the steps to prepare your containers for seed starting:
Getting the soil into the containers is the fun part and getting the seeds into that soil is the most fun of all!
Here are some tips for the containers:
Here’s a FAQ section on outdoor seed starting that will be helpful as you get started. I asked all these same questions when I started, too!
I put away Christmas decorations the first week of January and get started planting my seeds in their containers to place them outside in the ice, or snow, or rain, or sleet, or whatever is happening with the weather.
You can start seeds outdoors in containers basically anytime up until the end of your growing season, from winter to spring to summer to fall. Seeds are genetically wired to know exactly when to sprout. They take their cues from the weather – sun, day length, rainfall, temperature, etc. So, they may freeze, but this won’t hurt the seeds – in fact, the cold is like a clock ticking, winding down to germination time.
The seeds will sprout when they’re ready and grow up until they reach transplant stage. Make sure you remove the lid of the box once the seedlings reach the top to allow them to grow taller and stronger.
The only kind of plants that don’t respond well to cold weather outdoor planting in containers are tropical plants. You may, however, start tropical seeds outdoor in containers once all danger of frost has passed.
Otherwise – flowers, veggies, herbs, perennials – any seed can be starting in cold weather in containers outdoors.
Nope, not kidding.
It does sometimes happen that the weather will warm enough to germinate the seeds you’ve planted and then along comes a late frost that kills off your baby plants. Here’s what to do if this happens:
It’s more than ok to start seeds outdoors; it’s actually my preferred method now! There are two different ways you can do it.
You can start seed outdoors by planting them directly into the dirt – this method is called “direct sow”. However, unless you remember to water consistently, you may lose your baby seedlings to dehydration and exposure.
A much easier way to start seeds outdoors is to plant them into containers that have drainage holes and lids. As I’ve said, this method is often referred to as “winter sowing” even though it can be done any time of the year.
The containers act like mini-greenhouses for each batch of seed planted inside. They enjoy a safe environment free of digging or scratching animals, a stray foot, or any other catastrophe that might hinder the germination of a new seed.
I prefer to start seed outdoors because:
Yes, you really can start seeds outdoors in containers and pretty much any container will do.
You outdoor seed sowing container MUST:
As I said, I prefer rectangular, shoebox-type boxes with snap on lids. They stack well while I prepare them with soil for planting, are easy to drill holes into with a small bit on my electric driver, and hold up reasonably well in the elements.
I know it seems almost magical that seeds started outside don’t need to be babied but, with winter sown seeds, this isn’t a question you’ll have to ask yourself any longer! You’ll never have to take your seedling outdoors again!
When you start seeds indoors, it’s really important to watch their development closely so that you can begin hardening them off to make room for the next batch of seeds to plant indoors.
When you start seeds outdoors, you don’t have to worry about this phase at all because they’re already outside and completely acclimated to their environment.
The purpose of pre-soaking and even pre-sprouting your seeds is usually to speed up the process of seed starting. Some seeds have such dense outer coats that I’m a super lazy gardener and I rarely take the time to soak my seeds. With outdoor sowing, soaking your seeds isn’t really necessary.
If you are truly winter sowing (as in, planting your seed boxes in December, January, February), then you won’t have any need to pre-soak your seeds. These seeds that get planted outside that early go through many cycles of freeze/thaw and wet/drained. This means that the protective enzymes that cover the seeds are sufficiently worn away to enable sprouting.
Even if you plant your boxes in March and April, you won’t need to presoak your seeds.
If, however, you are planting seeds in boxes that you want to sprout quickly and those seeds are particularly hard (like sweet peas), pre-soaking your seeds can speed things along and improve germination.
Learn how to Soak or Sprout Seeds with Northern Homestead.
Milk Jug Photo Attributed to this Wikimedia Commons User.