DIY Growling Dog Knot Paracord Keychain – Survival Sullivan


Paracord has a thousand and one uses, from serious life-and-death situations to recreational pastimes, and everything in between.
Paracord has even been turned into something of a fashion statement, woven into watch bands, necklaces, rifle slings, bracelets, and keychains.
It’s definitely cool to make your own and show off your skill, but it’s also an entirely practical way to carry some of this heavy-duty cord with you in an unobtrusive and practical form.
Today, I’ll be showing you how to make the growling dog knot keychain variation, which is both simple to tie and a great way to carry two long lengths of paracord with you wherever you go.
I’ll tell you what you need and how to do it just below…
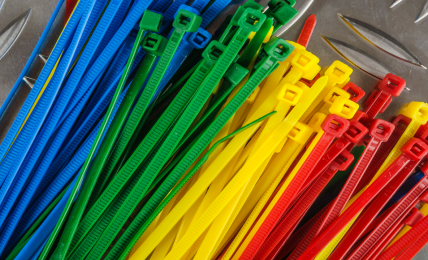
You’ll need a few of things to make this keychain variation. First, you’ll need two different lengths of paracord, each anywhere from a foot to a foot and a half in length depending on how big you want the finished keychain to be.
I highly recommend you use two different colors or patterns so you can tell them apart to make the process easier.
You’ll also need your actual keyring or a shackle depending on what you use, scissors or a sharp knife, a lighter and optionally a Paracord tool to help you seal the cut ends that you will melt later.
If you don’t have a paracord tool you can just use the side of your knife or scissors.
And that’s really it. Time to get down to tying…
Step 1: start with your two equal lengths of Paracord and your key ring as shown.
Step 2: take your first length of cord, fold it in half at the middle and pass the bight through the key ring.
Step 3: now grab the ends of the cord and pull them through the loop you just made…
Step 4: to form a cow hitch on the key ring as shown.
Step 5: repeat steps two through four with your other length of cord so you have two cow hitches side by side. It is critical that you tie them in the same direction and that each of the ends are even or very nearly so.
Step 6: now take the outer strand of the right side cord, which we will call the working strand, and pass it behind the adjacent standing part and then over the standing part of the neighboring cord…
Step 7: before continuing on, turning it under the standing part of the neighboring cord and then laying it over its own standing part. Look closely at the picture to make sure you have it exactly like this.
Step 8: now with the other cord, take the second working part and pass it through the opening in the middle formed in the previous step as shown, passing beneath the standing part.
Step 9: pull on both working cords to tidy up the weave as shown, pushing it up towards the key ring with your fingers if necessary.
Step 10: with the working end of the cord on the right, turn it beneath the standing part and then over the standing part of the neighboring cord.
Step 11: take the opposite working cord now, bring it over and then down through the opening in the middle as shown.
Step 12: tighten everything up as before, pressing the weave up towards the key ring. Now continue, simply repeating the process. With the working cord on the right, turn it under the standing part and then back over.
Step 13: then bring the opposite working cord up and over and then down through the opening in the middle, just like we did previously.
Step 14: tighten everything up, then keep repeating these steps. Turn the working cord on the right beneath the standing part and then bring it above the opposite standing part.
Step 15: and then again past the other working part through the opening in the middle you just made. Continue until your keychain is the right size or until you have about 3 inches left of cord on each side.
Step 16: once you are closing in on finished, you should have two cords sticking out on either side, one of each color.
Step 17: starting with the ones on the right, turn and underhand loop as shown.
Step 18: taking the opposite set, pass those ends through the loop you just formed from above as shown.
Step 19: switch again, then turn upward and down through the loop from above to form a knot.
Step 20: holding the middle of the keychain, pull snugly on all the free ends to cinch everything up good and tight.
Step 21: now cut off your remaining tails leaving about an eighth of an inch of cord protruding from the knot.
Step 22: use your lighter to melt the remnants that are sticking out.
Step 23: quickly, while they are still hot, use your paracord tool or the side of your scissors or knife to press and seal the cut ends, locking down the keychain.
And you’re done! Your keychain is ready to use.
Other paracord keychain guides you should try:
I really like this keychain, more than most, because it is so easy to make, easy to grip and because it allows me to carry two long sections of paracord that are ready to use and still strong themselves. Plus it looks really impressive!
Tom Marlowe practically grew up with a gun in his hand, and has held all kinds of jobs in the gun industry: range safety, sales, instruction and consulting, Tom has the experience to help civilian shooters figure out what will work best for them.