9 Tips for Canning Fruit Safely


If you were getting started on your canning journey like I did, you’re probably starting with fruit. There’s just something about at-home canned fruit that is delicious and delectable, and it works just as well as a snack or side dish as it does an ingredient for desserts.
And not for nothing, canning fruit tends to be a fair bit easier than canning vegetables or meat. It’s a great way to get your feet wet with at-home canning, and though it is easy, you’ve got to follow proper procedures if you want to stay safe.
Make sure your initial foray into canning goes smoothly and safely with these nine tips for processing fruit.
Before you do anything else, and you are getting down to the business of preserving a batch of fruit, you’ve got to sterilize your equipment.
That means your jars, all of your implements, and utensils, and everything else that will come into contact with the fruit or could come into contact with the fruit must be absolutely spotless and free of germs.
Don’t worry, you don’t have to act like you’re going into the operating theater with an autoclave, but you do need to send your jars, jar lifter, ladle, funnel, and the like through a hot cycle in the dishwasher or else thoroughly hand wash them with hot soapy water.
Omit this step, and the chances of spoilage are greatly increased. I know more than a few folks who wash their jars and then put them away in a squeaky clean state only to pull them out, give them a quick rinse and go but this won’t cut it. Sterilize every time immediately prior to use.
If you don’t have much experience with canning, you might not know what the differences are between water bath, pressure, and steam canning.
At its most basic, certain fruits, veggies, and other foods need to be canned using one or the other for safety, though you can use either or for some foods.
That’s a long conversation and an entire article unto itself, but all you need to know right now is that if you’re just starting out with fruit, a water bath or steam canner is all you’ll need.
Because fruits are high-acid foods, water bath canners can generate sufficiently high heat to reliably eliminate germs that cause spoilage.
Also, water bath and steam canners are a little gentler on food, like fragile fruits, compared to pressure canners, which means your finished product will be firm and have a better texture and a better flavor compared to pressure canning.
This isn’t to say you cannot use a pressure canner to preserve fruit, you can, but the results are going to be pretty disappointing even if they’re safe, and that’s just going to lead to frustration. Bust out the water bath canner and you’ll have an easy time of things.
One of the single most important tips I can give you for canning fruit is the one that my grandmother gave me: always, always use the very freshest fruit you can get for preservation.
This isn’t just a matter of good taste, though it definitely makes a difference. Fruit that is a little bit older, or should we say overripe, is already starting to break down because of enzymes that form in its flesh and skin.
Proper canning technique will stop these enzymes from doing their work, but their very presence will ever so slightly increase the risk of spoilage, or significantly increase the risk of spoilage if something goes wrong.
If you have any fresh fruit that is already badly shriveled, starting to discolor or dry out, save your time and potentially skip out on a case of food poisoning and discard it for the fresher stuff. You won’t regret it.
When you are ready to start processing the fruit to get it ready for canning, the very first thing you must always do is give it a thorough cleaning and then let it dry.
The necessity and utility of a good rinse and wipe-down should be obvious. This is to eliminate germs that are on the surface, particularly on the skin. Fruit with tougher skin can be gently brushed using a fruit brush for the purpose.
But you also want to dry the fruit or allow it to dry to further reduce the risk of germs to prevent the subsequent growth of bacteria and other microorganisms!
Use clean, fresh paper towels to do the job, or shake off the fruit gently and then let it air dry before you begin.
This will make sure that your produce is as clean and germ-free as it can be at the start of the canning process.
If you haven’t learned by now, you will soon: always follow canning recipe instructions to the letter. Not just for processing time but also for the actual preparation of your fruit.
Some recipes will call for whole fruit, others for pieces, slices, chunks, puree, or something else. Never assume that the preparation method of the fruit itself is interchangeable from recipe to recipe.
Canning, as mentioned, is fairly straightforward, but deviation from long-established and tested protocols will lead to spoilage and potentially food poisoning…
You can improvise with other (non-canning) recipes you are preparing on the stovetop or in the oven, but not when you’re canning!
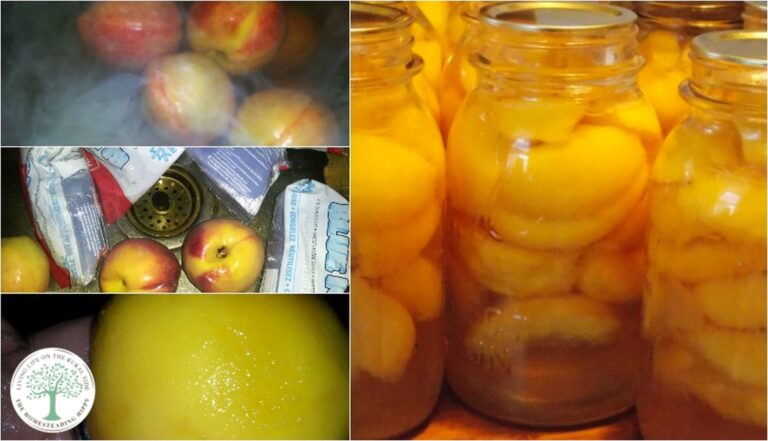
Blanching is a technique you’ll become well acquainted with when canning fruit. Basically, blanching is a quick dip in simmering or boiling water in order to loosen skins and stop enzymatic action which will contribute to spoilage.
Aside from increasing safety, it also improves the finished texture and taste of your canned produce.
Generally, you’ll have a bowl of ice water nearby and then a pot of boiling water on the stove. You must take great caution to avoid temperature-shocking glass and some metal containers: this can lead to splitting or even shattering!
Always carefully move the fruit from the hot water to the cold water, and never pour a large quantity of one into the other.
Another fundamental step for all canning procedures, not just fruit, is getting the headspace right.
This is the amount of air, or gap, you leave between the surface of the food and surrounding liquid and the lid of the canning jar. Getting it right is critical to ensure an airtight, vacuum seal.
For fruit, this is going to be between a quarter inch and half inch depending on whether you’re canning preserves, jams, or jellies or whole fruit or pieces thereof. Again, follow your recipe to the letter.
To make sure you have the headspace correct you must be able to reliably eyeball your particular jars, or use a ruler to make sure you get it right.
Also, don’t measure headspace until you have de-bubbled the jars; you’ll need to eliminate that trapped air to prevent spoilage and also to get an accurate measurement of headspace. This can be done with a specialized tool or a non-metallic utensil.
In my experience, it is especially important when canning fruit to keep the jars perfectly upright during all phases of the process.
Once you put a lid on them and screwed the band down, if you allow the jar to tilt or rock, or the contents inside to slosh heavily, this can interfere with a good seal and result in failure or, if undetected, spoilage down the line.
You can make this a whole lot simpler by using jar lifters. These special tongs will help you lift and maneuver hot jars without getting burned and with a much-reduced risk of dropping them.
If a jar tips over before or after processing, I would repack it in a fresh jar with a fresh lid to save yourself some trouble.
Once you are done processing your fruit, always check for seal integrity by inspecting the lid. Once you’ve removed the band, press on the top of the lid with a fingertip.
It shouldn’t move up or down, and it should not make a popping sound. If it does, the jar didn’t seal and you’ll need to reprocess it or eat it straight away.
Assuming that test is passed, carefully pick the jar up off the counter by holding just the edges of the lid; you shouldn’t detect any movement, there shouldn’t be any hissing, popping, or other signs of seal failure.
Do this for each jar. The ones that pass should be set aside for cooling before you store them. The ones that don’t should be consumed within days after cooling…

Tom has built and remodeled homes, generated his own electricity, grown his own food and more, all in quest of remaining as independent of society as possible. Now he shares his experiences and hard-earned lessons with readers around the country.
Find out more about the team here.