![]()
Canning home-cooked meals rather than keeping jars of individual ingredients, can be a viable alternative to MREs. Best of all you can make them yourself, at a much lower cost than the processed pouches sold in-store and online.
Yet canning home-cooked meals and keeping them safe to eat for 5 years or more takes more than just slopping some leftovers into a jar and twisting the lid tight.
There’s some food science and chemistry required to make sure the meals in the jar will remain safe to eat for years to come.
Sterilization is crucial for safe canning, ensuring that jars, rings, and utensils are properly sanitized to prevent contamination. This can be achieved through boiling jars in water for 10 minutes or dry sterilizing them in a 250°F oven for 15 minutes. Proper sealing is key: Mason jars can be reused, but lids with sealing gaskets should be replaced after each use to maintain the integrity of the seal.
For acidic foods, such as tomatoes and fruits, a water bath canning method works well. However, low-acid foods like meat require pressure canning to kill harmful bacteria such as botulism. Pressure canning at different altitudes requires adjusting the pressure level, from 10 lbs for low altitudes up to 15 lbs for higher elevations, to ensure safety.
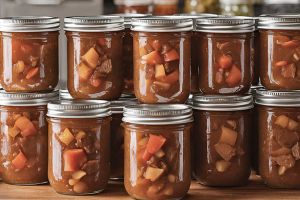
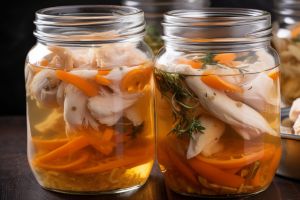
Beef Stew
Most red meat stews are canned the same way. You could easily replace beef with scraps of venison, lamb, goat, or chunks of pork shoulder.
With a stew meant for long-term canning, it’s best to use tougher cuts of meat, which will soften during the pressure canning process.
You can use ground meat if that’s all you’ve got, but the stew in the jar 5 years later usually has a grainy texture.r.
Ingredients
 2 lbs. cubed beef or venison
- 2 large red potatoes, cubed
- 1 cup diced onions
- 4 cups beef stock
- 1 cup diced carrots
- 2 tbsp tomato paste
- 1 tsp dried thyme and rosemary
- salt and pepper to taste
- 2 cloves garlic, minced
- 2 tbs of vegetable oil
 2 lbs. cubed beef or venison
Instructions
1. Salt the meat and sear in a hot Dutch oven over medium heat with the oil. Toss occasionally until the meat has a nice crust and there are brown bits in the bottom of the pan.
2. Put the tomato paste in the pot and toss for two minutes. Then pour the beef stock into the pot and scrape the bottom to deglaze the fond.
3. Add all the other ingredients except the minced garlic and turn the heat to low. Simmer for 30 to 45 minutes or until the carrots are toothsome, but not soft.
Related: How to Prepare Medicinal Pickled Garlic
4. While the stew simmers, finish preparing the jars and pressure canner.
5. Stir the minced garlic into the stew mixture and turn off the heat.
6. Carefully load the stew into the jars and place the lids with rings.
7. Process the jars in the pressure canner at 10 pounds for 90 minutes.
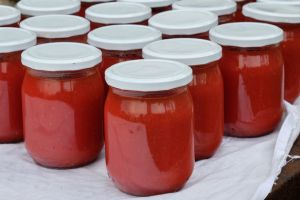
Spaghetti Sauce
I recommend growing your own tomatoes, rather than buying them from the supermarket. When you grow your own tomatoes, you get fresher, more flavorful tomatoes that are free from harmful chemicals and pesticides.
Plus, homegrown tomatoes can be harvested at their peak ripeness, which supermarket varieties often lack, all while saving money.
Ingredients
- 6 lbs. tomatoes, blanched and diced
- 1 large carrot chopped
- 1 large yellow onion, chopped
- 5 cloves garlic, minced
- 1 tbs dried basil
- 1 tbs dried oregano
- 4 tbsp olive oil
- salt and pepper
 6 lbs. tomatoes, blanched and diced
Instructions
1. Prepare the tomatoes while sterilizing the jars and canning equipment.
2. Add half the oil to a pan on medium-low heat, and slowly sweat the carrots to activate their natural sugars.
3. After 3 to 5 minutes the carrots will take on a little color and you can add the onions. Allow to sweat for 2 to 3 minutes to soften and activate the onion fragrance.
4. Add the tomatoes, three of the cloves of minced garlic, and the herbs. Allow the sauce to simmer for 10 to 12 minutes for the flavors to meld.
5. Add the last 2 tablespoons of olive oil and the 2 remaining cloves of minced garlic.
6. Pour the sauce into the sterilized jars allowing an inch of headroom. Then place the lid and tighten the rings.
7. Slowly lower the sauce into the boiling water bath. Allow it to process for 10 to 15 minutes before removing and allowing it to cool undisturbed for 2 hours.
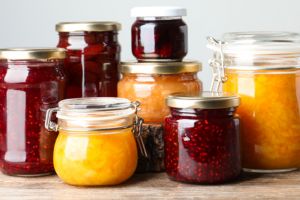
Mixed Berries Jam
Mixed berries and fruits can be preserved using the water bath method with a splash of lemon juice. I prefer foraging for berries for this recipe since they’re fresher and free from preservatives and pesticides. I especially enjoy adding this berry to my jam—it’s illegal to grow, but foraging it is perfectly fine.
The trick is to pack them in syrup and adjust the PH with just the right amount of lemon juice. I find that a light syrup does the best job of preserving the natural flavor and texture of the berries.
With lemon juice, you can then preserve the jars with the water bath method. I prefer to pressure can for a heavy syrup, just for the peace of mind of knowing that there aren’t any bacteria exploiting the high sugar content.
Ingredients
- 12 cups of assorted berries strawberries, blueberries, cherries, gooseberries or raspberries
- 2 cups of white granulated sugar
- 4 cups of Water
- 4 tbs of lemon juice
 12 cups of assorted berries strawberries, blueberries, cherries, gooseberries or raspberries
Instructions
1. While the jars are sterilized in the oven, wash the berries and remove any stems. Cut large berries into roughly 1-inch chunks.
2. Prepare the syrup by dissolving the sugar in water and stirring gently until it dissolves into a clear liquid. Allow to simmer for 3 to 5 minutes.
3. Remove the syrup from the heat and stir in the berries. Allow to cool for 10 to 15 minutes.
4. Add lemon juice and stir gently to combine.
5. Pour the mixed berries into pint-size jars and process using the water bath canning technique for 10 minutes. Then remove the jars and allow them to cool undisturbed for 2 hours.
Other Home-Cooked Meal Ideas for Jars
The above recipes give you a guide for how to preserve home-cooked meals in jars that will stay safe to eat for five years or more.
Once you’ve got the hang of these two cooking and canning methods, you can try some of the following recipe suggestions.
Chicken Soup
 When canning home-cooked chicken soup, I find its best to leave any sort of noodles or dumplings out.
They tend to get mushy when processed and are meant to be belly fillers. You can simply prepare whatever noodles, or dumplings you want when you open the jar later.
If you really do want to add a starch to the canned home-cooked chicken soup, I’d go with wild rice. It’s durable enough to handle the canning process.
Then pressure can the jars of chicken soup for 90 minutes at 10 pounds of pressure.
Bean & Ham Soup
Bean and ham soup is a hearty home-cooked meal you can keep in a jar for years. You can also err on the side of saltiness, as the beans will gradually absorb the salt over time. This further helps inhibit bacterial growth.
However, even with the added salt, the acidity of bean and ham soup is too low for water bath canning. If you want it to last up to 5 years, you’ll need to pressure can it for 90 minutes at 10 pounds of pressure.
American Goulash
Even with the acidity of the tomato sauce, you still need to pressure can home-cooked American goulash to ensure any bacterial presence in the meat is 100% sterilized.
It also works best to leave the noodles out of the jar, as they become flabby and soft. Rather you can pour the sauce over freshly prepared noodles when you open the jar later. This will give you a greater volume of sauce to preserve.
Regarding the meat component, I substitute ground beef for small chunks of eye of round or diced chuck roast. They tenderize perfectly after searing and canning, without the grainy texture ground beef sometimes gets when canned.
Instead of relying on MREs or overhyped survival food buckets with their meager serving sizes and inflated claims, I decided to take matters into my own hands. I turned to this guide to craft my own survival food solutions.
With over 100 recipes tailored for long-term storage without refrigeration, it became my go-to resource to create meals that truly satisfied and sustained me during challenging situations. So, rather than relying on inflated promises and underwhelming servings, I took charge of my prepping by preparing real, nourishing food using this invaluable guide.
You may also like:
 How to Start a Prepper Group in Your Community
Cheap and Easy Way to Build a Root Cellar in Your Backyard (Video)
These Common Items Will Become a Luxury When SHTF
12 Pioneer Skills We Can’t Afford to Lose
The Dark Side of Being a Lone Wolf