The Patrol Bicycle, by Kim Kipling. Diamondback Ascent EX mountain bike

No regular reader of SurvivalBlog needs to be encouraged to prepare for an uncertain future. Inspired and instructed by this forum, many of us spend great amounts of time, energy and money making preparations and setting aside tools, commodities, and supplies against the day when they are needed in an emergency, no longer available, or prohibitively expensive. And if you are like me, many of these items fall squarely into the category of “I pray I will never need this.” It is prudent to have them, but times will surely be hard if we ever have to reach for some of our stockpiled items. There is one useful tool, though, that is often overlooked, but which can be regularly used now, and which will pay immediate dividends on the investments necessary to add it to your preparations. I am speaking of a “Patrol Bicycle.”
The bicycle is one of the most efficient forms of transportation ever devised by man. It allows a single rider to travel farther, faster, with a greater load, and to arrive less fatigued than almost any other form of personal transport other than the automobile. It doesn’t eat, doesn’t require daily watering or grooming, it will tolerate very poor conditions with minimal shelter, and it doesn’t bite, kick, or poop. Properly chosen and maintained, it is a relatively inexpensive, highly durable tool. It is a simple machine, easily understood and maintained by the operator. It is inexpensive to operate and maintain. If one stocks a handful of specialized tools, a few spares of consumable items like tires, tubes, chains, and cables, and perhaps a spare wheel or two, it should last the adult user a lifetime and beyond. Parts are readily available, and expertise to repair and adjust it is likewise quite common. (There are many useful reference books and “how-to” guides available, and I would recommend investing in one or more.)
When traveling your property or neighborhood on a bicycle, you are close to the ground, immersed in the environment. Your senses of hearing and smell can remain fully engaged. You will see wildlife, notice subtle changes, detect evidence of intrusion, find useful screens, shadows, areas of cover or concealment, and take advantage of shortcuts to destinations that are indiscernible or inaccessible by car or truck. And you will do all of this almost silently. You will know your immediate area of operations far more intimately than you probably do at present.
Riding a bike is also good exercise! With a little practice, it will allow young and old alike to improve their cardiovascular fitness, flexibility, stamina and balance. It will save you time, and fuel, and maintenance costs. And working on your bike to repair, maintain or modify it will teach you useful mechanical skills and help you develop a strong understanding of your machine and its attributes. It is also fun, and it is a family-friendly activity. For all of these reasons, the Patrol Bike shines as a highly useful piece of preparedness equipment.
How useful can the Patrol Bike be, in a “Grid Down” or “Without Rule of Law” situation? Consider this: until 2001, the Swiss Army maintained a Bicycle Regiment of highly-mobile light infantry. Under their doctrine, very fit soldiers would muster, and ride heavy-duty military bicycles to the scene of operations, equipped with all of their small arms and field gear. They would ride, or when necessary, dismount and push their bikes up steep mountain roads, and then coast at 20mph-plus down the other side of the ridge. This unit could maneuver far more rapidly than foot infantry, carrying heavier arms and more supplies. While the concept is perhaps outdated for the modern battlefield against a near-peer, first-world enemy, it remains valid in a more austere, limited scenario. For example, a property owner can cover more of his land in a single patrol in less time on a bike than on foot.
Bicycles are nearly silent, so they allow discreet movement. Think “slipping in quietly” rather than “roaring up on ATVs.” A neighborhood watch or armed response group could respond to an alarm at a perimeter checkpoint far more quickly and with far less fatigue than running there on foot. And in a “bugging out” scenario, a heavily-loaded bike can transport you and your gear much more efficiently than walking while carrying all your worldly goods in your rucksack, even if by pushing your loaded bicycle rather than riding it. Obviously, terrain and seasonal and inclement weather patterns unique to each location have a bearing on the bicycle’s useful operating envelope.
A Patrol Bicycle, as defined by this author, is a sturdy, reliable bike, judiciously modified to serve a specific purpose. A few years ago, I decided to create one for myself. My choices may not be your choices, and I spent more than is required to achieve the same effect. Tailor your decisions to your budget, your environment, and your perceived needs. If you are going to use your Patrol Bike primarily off-road, then choose knobby trail bike tires instead of street tires. If you live in a mountainous area, opt for a bike with far more robust brakes, and maintain them carefully. When I built my Patrol Bike, I lived in Virginia, in fairly flat country. I now live in Tennessee, with much steeper hills with which to contend. If I were building this bike today, then I would opt for a bike with beefy hydraulic disc brakes.
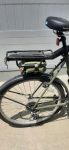
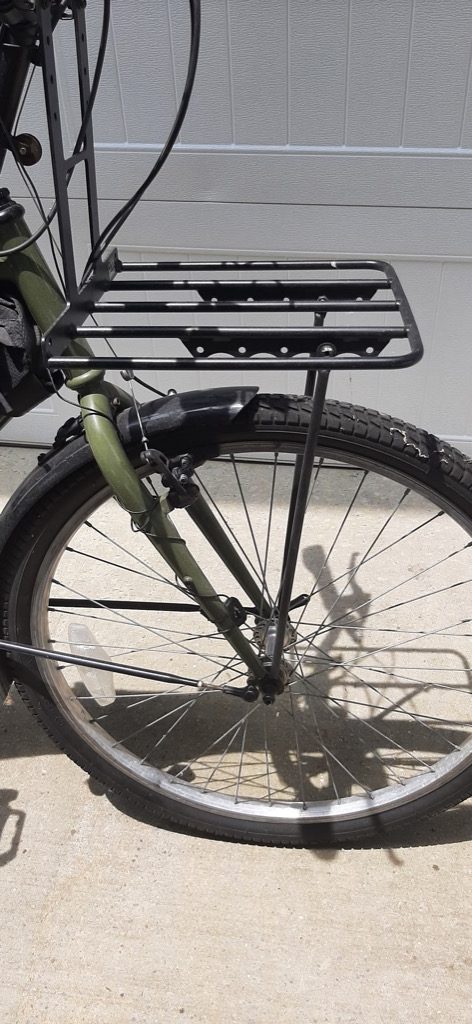
I began by choosing a candidate for Patrol Bicycle conversion. I bought a used 1988 Diamondback Ascent EX mountain bike, which was battered cosmetically, but which had been being used as a city commuter by a cycling enthusiast. It had been well-maintained. These first-generation mountain bikes were simple and had an excellent reputation for toughness and durability. They were built to last. The chromoly steel frame and forks are not feather-light, but they are crowbar rugged. I of course bought a bike of the proper frame size for my six-foot plus height.
I borrowed a maintenance stand and a set of bicycle tools; if you embrace this project and plan to equip multiple family or group members with individual bikes, you may want to purchase a set. I then totally disassembled the bike, taking care to take a great many digital photos to record EXACTLY what came from where, to make reassembly easier (and for me, possible. This was my first deep-dive into bicycle engineering.)
After cleaning and inspection, I determined which parts could be salvaged and which should be replaced. I ended up replacing the saddle, handlebars, hand grips, both wheels, the tires and tubes, all cables, the chain and the brake pads. I repaired the head tube bearings and replaced the bottom bracket bearing. I kept the original gear cassette, derailleur, pedals, brakes and brake levers, fenders, and friction shifters. (Choose your handlebars and saddle for comfort. A relatively upright riding position is better than the classic speed cyclist’s forward lean, and a well-chosen saddle with plenty of padding is better for the occasional rider than the professional’s minimalist torture rack. Simpler is likely better.)
To suit my own tastes, I had the frame powder coated in olive drab, and as much exposed metal as possible powder coated flat black. I hand-spraypainted a few shiny odds and ends flat black to blend and match. I removed all but a couple of reflectors; in the event of need in a potentially hostile environment, I would remove the last few quickly and easily. I added an inexpensive bike computer to allow me to monitor speed and distance traveled. I chose to include a kickstand.
I also wanted to incorporate the ability for the bike to carry a tube patch kit, basic tools, personal supplies and a moderate load of cargo. To this end, I added a front and a rear cargo rack, a frame bag and a patch kit bag. The front rack is by Cetma Cargo, in Eugene, Oregon, and it is extremely well-made. The rear rack is an inexpensive Schwinn model. (Shown without the rifle rack installed.) There are many designs to choose from, or you may fabricate your own.
The frame and patch kit bags were both purchased inexpensively on Amazon.com, but you could conceivably make your own if you are handy at gluing/sewing waterproof material. Plan Conservatively: the front rack should carry no more than about thirty-five pounds of cargo weight. More than that, and your handling is compromised and it becomes unsafe. The rear rack will likewise carry about the same or less, depending upon design.
Once I had the bike reassembled, I took it to a reputable bike shop and had it thoroughly checked and adjusted by a professional bike technician, to make sure that I had not made any potentially-fatal errors or oversights. This peace of mind was worth the additional cost to me; YMMV.
A word about weapons carriage on your Patrol Bike. There is no perfect solution, and you will have to fabricate your own rifle/shotgun rack. I found that riding with a slung rifle is possible, but becomes uncomfortable quickly. Attaching the rifle to the bike’s frame, muzzle pointing down, interferes with mounting, dismounting and pedaling. Mounting it horizontally, across the handlebars, adds overall width and forward weight and can interfere with shifting, braking, handling, and steering. I ultimately settled on using a pair of the U-shaped rubber clamps intended for mounting a weapon on an ATV. I attached a short piece of aluminum tubing to the side of the rear rack using u-bolts, then attached the weapon clamps to the tubing at the appropriate spacing for the specific weapon. In use, the weapon rides horizontally, muzzle pointing to the rear, just behind the rider.
So built, the Patrol Bike allows the rider to quickly and quietly get him- or herself, a light cargo load and a long gun to and from destinations within a reasonable distance. It is much quicker and easier to do this than if moving on foot. I get lots of compliments when I ride my Patrol Bike (with the rifle rack removed) on the public bike trails in the city nearest my country home, and other riders enjoy asking about it; it is unusual to say the least, and the most common comment in response to my explanation of its origins and purpose is “Cool! I want one!” You may wish to consider building one of your own. Happy prepared riding!
—
Safety Postscript: Consider the state of your health and consult your doctor before beginning any program of strenuous activity and exercise. Take it easy at first, both with your speed and the intensity/duration of your rides. Be cautious in mounting, dismounting and riding, especially on trails, hills, and roads with automobiles. Padded cycling shorts are worth every penny, as are padded cycling gloves. Wear eye protection: a bug or tree branch in the eyes is always unpleasant. Always wear a helmet – the brain is vital and irreplaceable. Keep your cargo weight down until you are comfortable with your riding skills, and add weight slowly to determine your limits and the changes on your bike’s handling and stopping distances. Maintain your brakes carefully: the more weight you habitually carry, and the more mountainous your terrain, the more often you will need to replace and adjust critical components.
About the Author:
Kim Kipling (a pseudonym) is a retired U.S. Navy officer and CIA Paramilitary Operations Officer with over thirty years of service with the CIA, both as a Staff Officer and a Contractor. He has never been anywhere particularly interesting, nor done anything which might reasonably be considered noteworthy.
Kipling is the author of three books, all only available through Amazon.com. These include:

